DIY Napkin Decoupage onto Thanksgiving Plate Chargers
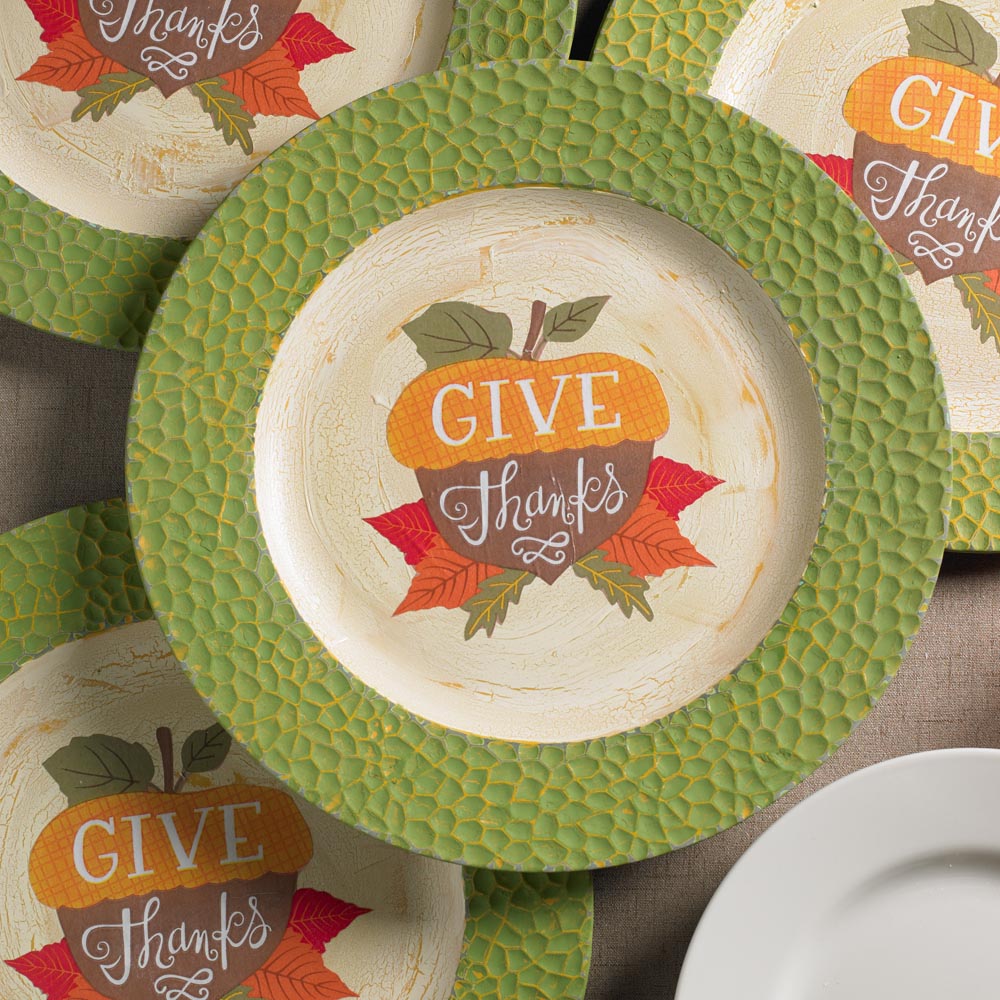
I’m officially obsessed with napkins and Mod Podge. It is so easy to decoupage with napkins. The only really tricky part is separating the napkins into layers. For these chargers, I used a thanksgiving napkin. Of course you could do this same idea with just a copy of an image.
VIDEO HOW TO!
/>
Supplies
FolkArt Acrylic Paint: Hauser Green, Turner Yellow, Vintage White
FolkArt Crackle Medium
Mod Podge Dishwasher Safe
Charger
Paintbrushes
Sanding sponge
Paper Thanksgiving motif (1 per charger)
Instructions
Paint each charger Turner’s Yellow. Allow to dry.
Paint a med coat of Crackle Medium on each charger. Allow to thoroughly dry before step 3.
Top coat the center of the charger with Vintage White and the rim with Hauser Green. When applying the top-coat, paint in one direction and don’t paint over your first brushstrokes. As the top-coat dries you will begin to see crackling. Allow to dry for two hours.
Sand the edges and rim with a sanding sponge. Wipe clean.
Apply Mod Podge to the center of the charger and to the back of the Thanksgiving paper. Place the paper in the center of the charger. Press with your fingers to remove any air bubbles. Wait 15 minutes. Top-coat the entire the charger with Mod Podge Dishwasher safe. Allow to cure. See bottle for cure times.
PROJECT TIP: Personalize the chargers by stenciling a family name in the center.
