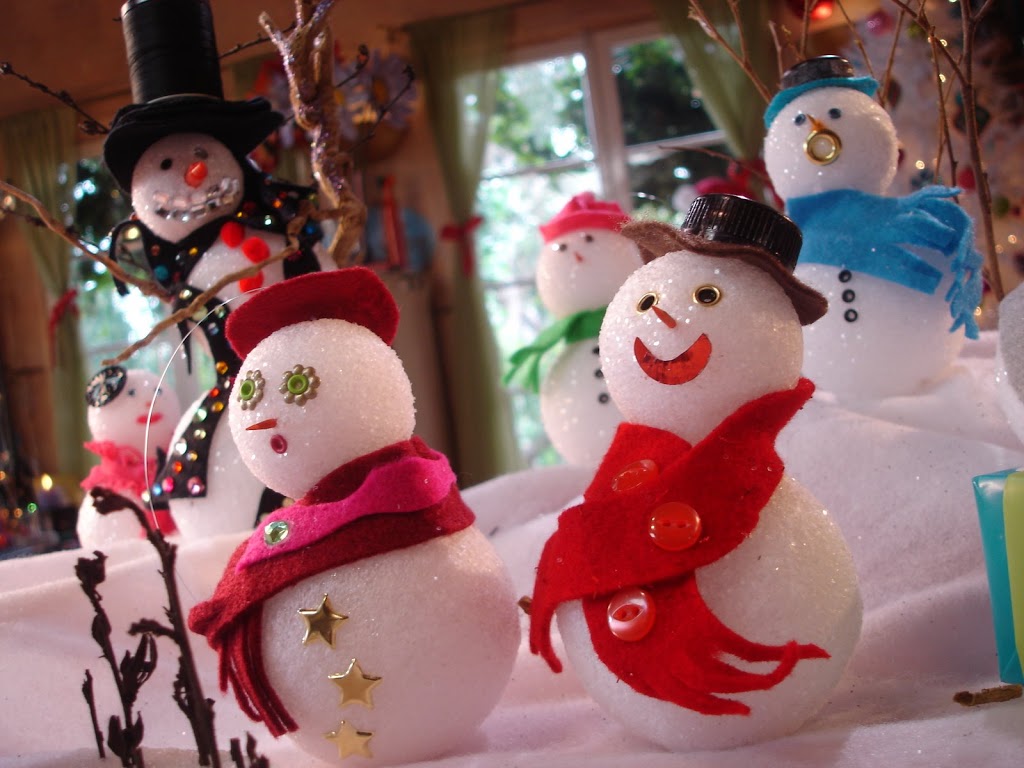
You can craft up a whole village of snow people. They are made with Styrofoam balls and glitter. The accessories are made from felt, scrapbooking embellishments and a few recycled items like little bottle caps for hats. Kids and adults love this projects – so get glittering.
Supplies List:
2 Styyrofoam balls – one slightly larger than the other
White, clear or iridescent glitter
Scrapbooking eyelets and brads (for eyes and details)
3 small buttons
2 toothpicks
Felt scraps (for the snowman’s scarf and hat)
2 two-liter soda bottle caps
Permanent marker
Orange acrylic craft paint
Tacky glue
Embellishments
Steps:
1. Roll the balls in tacky glue and then sprinkle glitter all over the balls, allow to dry. Secure the larger snowball (the body) to the smaller snowball (the head) by pushing a toothpick into the body and placing the head on top, add a drop of glue. Flip the snowman over and push one of the two-liter soda bottle caps into the bottom of the body to form a firm base.
2. Use the permanent marker to color the other two-liter soda cap. This will be the top of the snowman’s hat. Cut a small circle of felt to form the brim of the snowman’s hat. Glue the soda cap to the brim. Once dry, glue the hat in the desired position on the head of the snowman.
3. Working on the face of the snowman, place and push eyelets or brads into the Styrofoam to form the eyes, mouth, cheeks, etc. You can use tacky glue for extra security.
4. Paint the second toothpick orange and allow to dry. Cut the toothpick in half and push into the nose area of the face to form the carrot nose. Tacky glue can be used for extra security.
5. Cut the felt into a long rectangular shape and snip fringe at the ends to make a scarf. You can layer up many shapes and colors of felt to add details. Wrap and glue the scarf around the snowman’s neck. Add buttons and any additional embellishments.
6. Working on the body, glue buttons down the front or push brads into the body for extra details.
| Join us on Facebook, instagram, pinterest and twitter!
Happy Holidays! |






What a cute idea! Great use for recycling and using extra scrapbooking embellishments! Love them!
Thanks for sharing!
Jenn