DIY Thanksgiving Chalkboard Menu
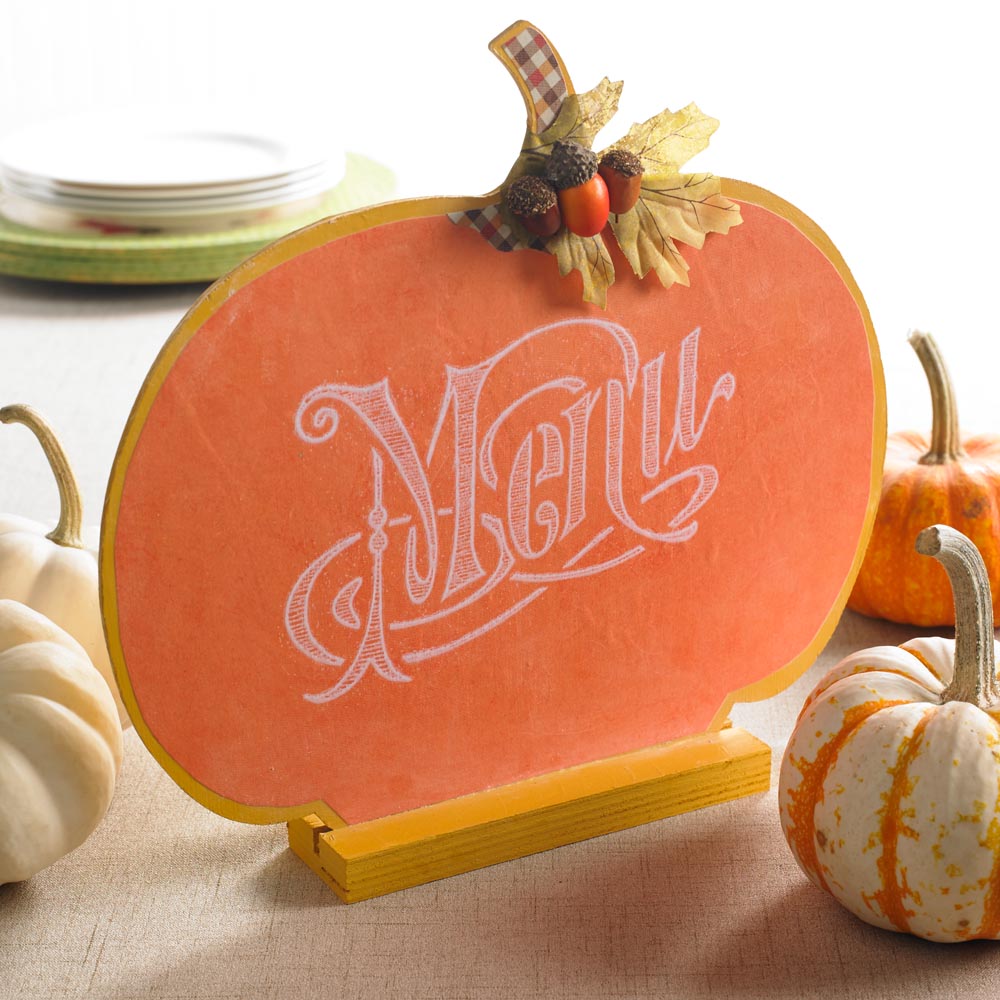
I’m a big fan of displaying the menu at large family and friend meals. Especially with so many food allergies and dietary restrictions. Ok let’s face it…. the menu also helps cuts down on all the questions while I’m busting my tushie to get all the food to the table. hehe. So when, I spotted this wood pumpkin blank… I thought it would make a great menu sign……and it did!
Materials:
FolkArt Acrylic Paint: Turner’s Yellow, Wood pumpkin plaque with stand, Mod Podge, Paintbrushes, Orange scrapbook paper, Fall scrapbook paper, Scissors, Decorative leaves and acorns, Mod Podge Chalkboard, Chalk, Hot Glue
Instructions:
Paint the pumpkin with Turner’s Yellow. Allow to dry.
Trim the orange paper to fit the pumpkin. Trim the Thanksgiving paper to the shape of the stem. Apply Mod Podge Satin to the pumpkin and to the back of the orange paper. Position the paper onto the painted pumpkin. Use a squeegee to remove any wrinkles. Apply the stem piece in the same fashion.
Allow to dry for 15 minutes, Top-coat with Clear Chalkboard. Use two coats with dry time in between. Once dry, season with chalk by rubbing chalk over the surface. Wipe clean.
Use the Mod Melter, to attach the decorative items near the stem.
PROJECT TIP: Mod Podge Clear Chalkboard Topcoat works over paper or paint.
