Supplies:
Several used greeting or note cards
2 1/2” punch or a glass with a 2 1/2” base for tracing
Pencil
Small scrap of cardboard
Ruler
Optional: bone folder
Glue stick
Binder clips
Hole punch
Decorative ribbon
Steps:
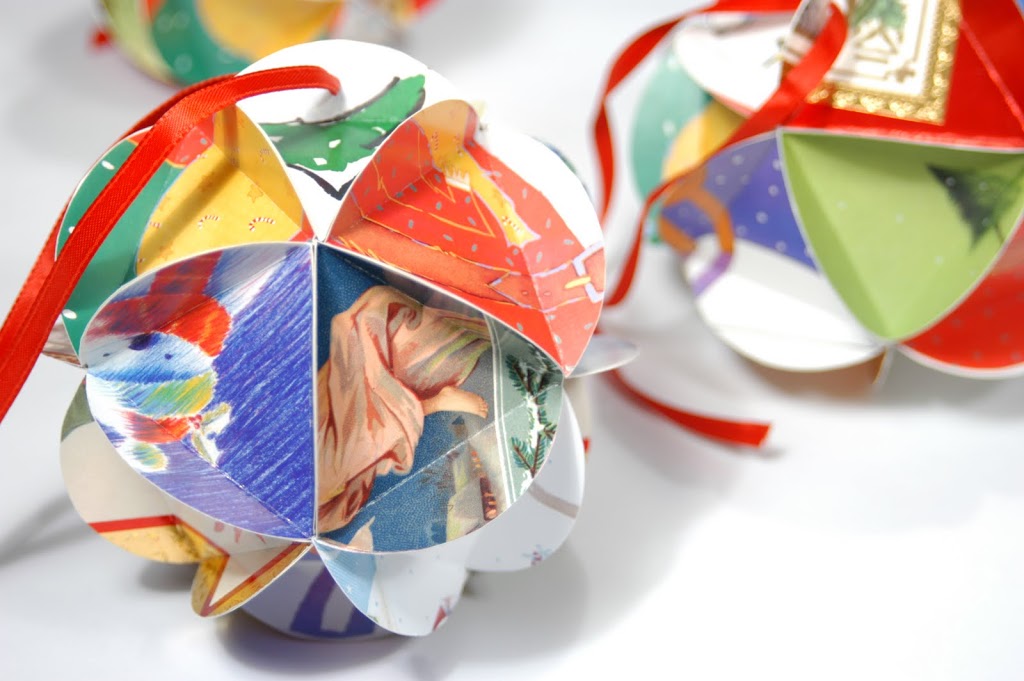
1. Use the 2 1/2” punch (or trace the 2 ½” glass base) to punch 20 circles from assorted cards.
2. Using the ruler and pencil, draw a triangle measuring 2 1/8 inch on all sides onto the scrap of cardboard. Cut out the triangle to use as a template.
3. Trace the triangle onto the back of each greeting card circle and score each circle along the triangle lines using the bone folder or ruler. The circle should fold so that the printed sides of each circle are on the interior of a small triangle-bowl shape.
4. Using five of the scored circles, glue stick the flap of one circle to the flap of another, continuing with all five circles to form a star shape. Clamp together with binder clips and allow them to dry for 15 minutes.
5. Working with ten more greeting card circles for the middle layer, glue the flaps to the bottom layer flaps, clamp, and dry.
6. Use the last five greeting card circles to form the top layer. Glue, clamp, and dry.
7. Punch one extended flap with the hole punch, thread a length of decorative ribbon, and hang.







Another fantastic idea. Thanks! I love doing holiday craft projects with cards. I’ve been busy making origami gift boxes and decoupaged and sprayed painted wooden trays this year using holiday cards. They also make great gift tags and item/price tags for craft shows.
Hey, I love these repurposed holiday card ornaments. So very eco-clever!! Thanks for the tutorial.